有一些 VCD 光碟在 Windows 下可以直接通过复制 /MPEGAV/AVSEQ*.DAT 来转录。而到了 Linux 下面会发现有时可以,有时不可以。
那么,既然 MPlayer 可以播放 VCD,Mencoder 就可以转录 VCD。
用下面的命令:
mencoder -o AVSEQ01.mpg -of mpeg -ovc copy -oac copy vcd://1
斜体字的“01”可以提换成轨道编号。
送给有需要的人。
mencoder -o AVSEQ01.mpg -of mpeg -ovc copy -oac copy vcd://1
于 2013年10月29日 20:32, z******@sina.com (MD5: bfd8b2538b0aacaabebdd403a75feaff) 写道:> 你好!> ripple在github上做活动,每个在5月1日之前注册github账户并有代码的,都可以> 获得ripple。 活动时间可能马上就要结束,如果你拿ripple没有什么用,你可以> 免费按照以下步骤几秒钟获取,然后将将获取的代码回复邮件给我,我给你30元烟> 钱补偿。谢谢!也可以加qq1123969311详细询问。> 1:访问:https://giveaway.ripple.com/>> 2:登录github帐号> 3:> 1):在Ripple address中填入rEeUEELwP2qX42kegfY6itmBp4K5rmPELS 然后点击下> 面的按钮,生成code(会获得一大堆字符串)>> 2): 将生成后的code和你的支付宝帐号发送到 我这个邮箱地址。> 我看到了后,就会给你们福利或者折现30元,转账到你的支付宝或者给你们冲手机> 话费都可以的。
于 2013年11月7日 23:40, c***********@gmail.com (MD5: 0d80e06fe66b8d4ea1e246e6ae160a98) 写道:> 帐号要求2013年5月1日前注册,并发布过东西> 任务主要流程:登录github,关注那个开源代码,然后就能生成code了> 详细介绍文章:> http://hi.baidu.com/yhtmetxfblbfmuq/item/49a3ca5d61cb7fe6d48bac11> 如果以上地址访问不了,你还可以试试这个地址:> http://note.youdao.com/share/?id=ff7bb19251ffa5519cc9ed9e1e01a395&type=note
“F**k you NVIDIA!”—Linus Torvalds

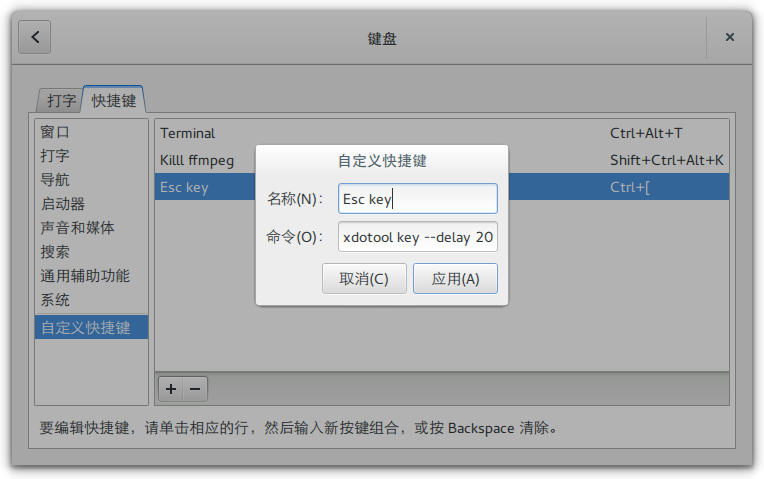
./danmaku2ass -o foo.ass -s 1920x1080 -fn "MS PGothic" -fs 48 -a 0.8 -l 5 foo.xml
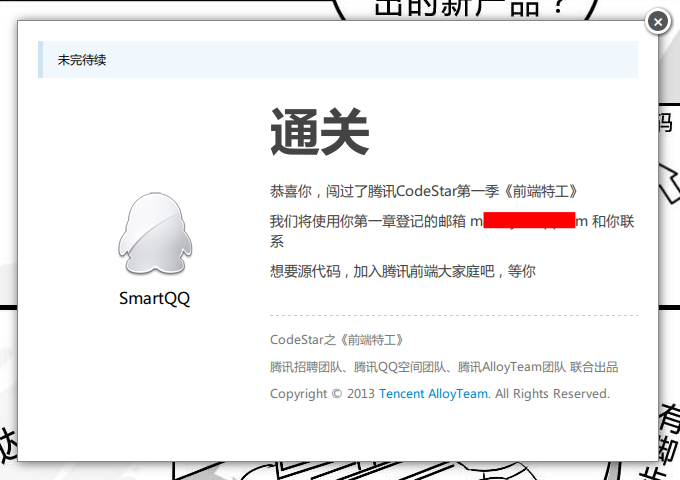
<!--

【云云无情,腾腾有爱】

如果你没有100个“往来”好友,那就来腾讯领红包吧!红包精彩,腾讯更精彩!
http://www.ipresst.com/jointencent

-------------华丽的分割线-------------

【前端特工】

“据内线消息,TX公司将于近期推出一个新的HTML5重磅产品。
公司担心该产品会带来威胁,特命你潜入TX,探查底细……”
http://codestar.alloyteam.com

-->
set $botblocker_flag "0";
if ($http_user_agent ~* "bot|spider|crawl") {
    set $botblocker_flag "${botblocker_flag}1";
}
if ($uri !~ "/robots.txt(\?.*)?") {
    set $botblocker_flag "${botblocker_flag}2";
}
if ($botblocker_flag = "012") {
    return 403;
}
set $botblocker_flag "";
location = /noie.html {
    return 403;
    error_page 403 =403 @noie;
}
location @noie {
    root /var/www/error;
    index noie.html;
}
if ($http_user_agent ~* "MSIE| (360)?se |360spider|sou?gou|tencenttraveler") {
    rewrite .* /noie.html;
}
location / {
    proxy_pass http://test_tornado;
    include proxy_params;
}
location ~ ^/api {
    proxy_pass http://test_tornado_backend;
    include proxy_params;
}
import tornado
import tornado.gen
import tornado.options
import tornado.httpclient
import tornado.web


class APIProxyHandler(tornado.web.RequestHandler):
    @tornado.gen.coroutine
    def get(self):
        yield self.post()

    @tornado.gen.coroutine
    def post(self):
        http_client = tornado.httpclient.AsyncHTTPClient()
        request_headers = self.request.headers.copy()
        request_headers.add('X-Forwarded-For', self.request.remote_ip)
        request_options = {
            'url': '?'.join([tornado.options.options.backend]+self.request.uri.split('?', 1)[1:]),
            'method': self.request.method,
            'headers': request_headers,
            'body': self.request.body,
            'user_agent': self.request.headers.get('User-Agent', 'Tornado/%s' % tornado.version),
            'connect_timeout': 60,
            'request_timeout': 60,
            'follow_redirects': False,
            'use_gzip': True,
            'allow_nonstandard_methods': True,
            'allow_ipv6': True,
        }
        try:
            response = yield http_client.fetch(tornado.httpclient.HTTPRequest(**request_options))
        except tornado.httpclient.HTTPError as e:
            response = e.response
        self.set_status(response.code, response.reason)
        existed_headers = set()
        for header_name, header_value in response.headers.get_all():
            if header_name.lower() in ('content-encoding', 'content-length'):
                continue
            elif header_name in existed_headers:
                self.add_header(header_name, header_value)
            else:
                self.set_header(header_name, header_value)
                existed_headers.add(header_name)
        self.finish(response.body or None)
One day, a programmer met one problem. He said, 'I will solve it with threads.' Then has he problems two now.
One day, a programmer met a problem. He said, 'I will solve it with Java.' Then he has a ProblemFactory.One day, a programmer met one problem. He said, 'I will solve it with regular experssions.' Then he has two problems now.'I know, I’ll use Python.' Now they import solution and have a beer.'I know, I’ll use LISP.' Now their problem is recursive.One day, a programmer met a problem. He said, 'I will use pointers in C.' Now thSegment Fault (core dumped)One day, a programmer met an encoding problem. He said, 'I will switch from UTF-8 to GBK.' 锟斤铐锟斤铐锟斤铐锟斤铐锟斤铐锟斤铐锟斤铐锟斤铐
Client> 2013-10-02 23:28:11 [CLIENT] [INFO] [CHAT] [Server] Herobrine is near you...
Client> 2013-10-02 23:28:18 [CLIENT] [INFO] [CHAT] <StarBrilliant> herobine...
Client> 2013-10-02 23:28:40 [CLIENT] [INFO] [CHAT] <Icewater> what is it
Client> 2013-10-02 23:28:57 [CLIENT] [INFO] [CHAT] <StarBrilliant> you don't know herobine?
Client> 2013-10-02 23:29:08 [CLIENT] [INFO] [CHAT] <Icewater> No, I don't
Client> 2013-10-02 23:29:28 [CLIENT] [INFO] [CHAT] 已设置床
Client> 2013-10-02 23:29:52 [CLIENT] [INFO] [CHAT] StarBrilliant 暂时离开了
Client> 2013-10-02 23:30:17 [CLIENT] [INFO] [CHAT] [Server] <Herobrine> You.
Client> 2013-10-02 23:30:23 [CLIENT] [INFO] [CHAT] StarBrilliant 回来了
Client> 2013-10-02 23:30:23 [CLIENT] [INFO] [CHAT] <StarBrilliant> herobine...
Client> 2013-10-02 23:31:06 [CLIENT] [INFO] [CHAT] [Server] <Herobrine> I'm watching.
Client> 2013-10-02 23:32:08 [CLIENT] [INFO] [CHAT] [Server] <Herobrine> Eyes...
Client> 2013-10-02 23:32:47 [CLIENT] [INFO] [CHAT] <StarBrilliant> .................
Client> 2013-10-02 23:33:11 [CLIENT] [INFO] [CHAT] <Icewater> kill
Client> 2013-10-02 23:35:03 [CLIENT] [INFO] [CHAT] [Server] <Herobrine> You, miner, StarBrilliant. You should expect me.
Client> 2013-10-02 23:35:11 [CLIENT] [INFO] [CHAT] <StarBrilliant> Herobine?
Client> 2013-10-02 23:37:18 [CLIENT] [INFO] [CHAT] [Server] <Herobrine> God will strike you.
Client> 2013-10-02 23:37:32 [CLIENT] [INFO] [CHAT] 你刚刚被雷击中了
Client> 2013-10-02 23:37:35 [CLIENT] [INFO] [CHAT] <StarBrilliant> oh!
Client> 2013-10-02 23:37:48 [CLIENT] [INFO] [CHAT] <StarBrilliant> hi Herobine
Client> 2013-10-02 23:38:56 [CLIENT] [INFO] [CHAT] [Server] <Herobrine> God will strike you.
Client> 2013-10-02 23:38:58 [CLIENT] [INFO] [CHAT] 你刚刚被雷击中了
Client> 2013-10-02 23:39:09 [CLIENT] [INFO] [CHAT] 已设置床
Client> 2013-10-02 23:39:09 [CLIENT] [INFO] [CHAT] You can only sleep at night
Client> 2013-10-02 23:39:47 [CLIENT] [INFO] [CHAT] [Server] <Herobrine> You can never escape...
Client> 2013-10-02 23:39:59 [CLIENT] [INFO] [CHAT] 你刚刚被雷击中了
Client> 2013-10-02 23:40:10 [CLIENT] [INFO] [CHAT] <StarBrilliant> ...
Client> 2013-10-02 23:40:18 [CLIENT] [INFO] [CHAT] <StarBrilliant> HIM!
Client> 2013-10-02 23:40:23 [CLIENT] [INFO] [CHAT] <StarBrilliant> I saw HIM!
Client> 2013-10-02 23:41:17 [CLIENT] [INFO] [CHAT] <dmql> wait
Client> 2013-10-02 23:41:22 [CLIENT] [INFO] [CHAT] <StarBrilliant> I saw HIM!
Client> 2013-10-02 23:41:25 [CLIENT] [INFO] [CHAT] <StarBrilliant> I saw Herobine!
Client> 2013-10-02 23:41:55 [CLIENT] [INFO] [CHAT] [Server] <phoenixlzx> Herobrine please stop trolling my players. :-)
Client> 2013-10-02 23:42:06 [CLIENT] [INFO] [CHAT] <StarBrilliant> lol
Client> 2013-10-02 23:42:07 [CLIENT] [INFO] [CHAT] <Icewater> ................
Client> 2013-10-02 23:42:19 [CLIENT] [INFO] [CHAT] [Server] <Herobrine> Yes, Master.
function export
    for i in $argv
        set -l __export_var (echo -n $i | grep -o '^[^=]*')
        if test $__export_var = $i
            set -g -x $__export_var $$__export_var
        else
            set -g -x $__export_var (echo -n $i | sed -e 's/^[^=]*=//')
        end
    end
end
cat ~/.bashrc | grep '^alias \|^export ' | .
ffmpeg -i "concat:input1.mpg|input2.mpg|input3.mpg" -c copy output.mpg
ffmpeg -i input1.flv -c copy -bsf:v h264_mp4toannexb -f mpegts input1.tsffmpeg -i input2.flv -c copy -bsf:v h264_mp4toannexb -f mpegts input2.tsffmpeg -i input3.flv -c copy -bsf:v h264_mp4toannexb -f mpegts input3.tsffmpeg -i "concat:input1.ts|input2.ts|input3.ts" -c copy -bsf:a aac_adtstoasc -movflags +faststart output.mp4
file 'input1.mkv'file 'input2.mkv'file 'input3.mkv'
ffmpeg -f concat -i filelist.txt -c copy output.mkv
mencoder -forceidx -of lavf -oac copy -ovc copy -o output.flv input1.flv input2.flv input3.flv
ffmpeg -i input1.mp4 -i input2.webm -i input3.avi -filter_complex '[0:0] [0:1] [1:0] [1:1] [2:0] [2:1] concat=n=3:v=1:a=1 [v] [a]' -map '[v]' -map '[a]' <编码器选项> output.mkv
#!/usr/bin/env python

import time

import tornado.gen
import tornado.httpserver
import tornado.ioloop
import tornado.options
import tornado.web


tornado.options.define('port', default=10489,
                       help='run on the given port', type=int)


class CountHandler(tornado.web.RequestHandler):
    @tornado.web.asynchronous
    @tornado.gen.coroutine
    def get(self):
        for i in range(1, 101):
            yield tornado.gen.Task(
                tornado.ioloop.IOLoop.instance().add_timeout, time.time()+1
            )
            self.write(('%s\n') % i)
            self.flush()
        self.finish()


class BombHandler(tornado.web.RequestHandler):
    def get(self):
        self.set_header('Content-Encoding', 'gzip')
        self.set_header('Content-Type', 'text/html')
        self.set_header('Content-Length', '2147483647')
        with open('bomb.gz', 'rb') as f:
            self.write(f.read())


def main():
    tornado.options.parse_command_line()
    application = tornado.web.Application([
        ('/count', CountHandler),
        ('/bomb', BombHandler),
    ])
    http_server = tornado.httpserver.HTTPServer(application)
    http_server.listen(tornado.options.options.port)
    tornado.ioloop.IOLoop.instance().start()


if __name__ == '__main__':
    main()
dd if=/dev/zero bs=4M count=1k | gzip -9 >bomb.gz
export PATH="$HOME/.local/bin:$HOME/.local/sbin:$PATH"
export LD_LIBRARY_PATH="$HOME/.local/lib"
export LD_RUN_PATH="$HOME/.local/lib"
export PREFIX="$HOME/.local"
export LDFLAGS="-L$HOME/.local/lib"
export CFLAGS="-I$HOME/.local/include"
export CPPFLAGS="-I$HOME/.local/include"
server {
 listen 80 default_server;
 listen [::]:80 default_server ipv6only=on;
 root /var/www;
 index index.php index.html;
 autoindex on;
 autoindex_localtime on;
 try_files $uri $uri/ =404;
 location ~ ^/~([^/]+)(/.*)?\.php(/.*)?$ {
  alias /home/$1/public_html$2.php;
  fastcgi_pass unix:/var/run/php5-fpm.sock;
  fastcgi_index index.php;
  include fastcgi_params;
  fastcgi_param SCRIPT_FILENAME /home/$1/public_html$2.php;
  fastcgi_param PATH_INFO $3;
 }
 location ~ ^/~([^/]+)(/.*)?$ {
  alias /home/$1/public_html$2;
 }
}
Note that there is a longstanding bug that alias and try_files don't work together.
--- a/ffmpeg/PKGBUILD 2013-06-06 01:43:40.319846062 +0800
+++ b/ffmpeg/PKGBUILD 2013-05-26 21:35:51.118143876 +0800
@@ -57,7 +57,9 @@
     --enable-shared \
     --enable-vdpau \
     --enable-version3 \
-    --enable-x11grab
+    --enable-x11grab \
+    --enable-nonfree \
+    --enable-libfaac


   make
--- a/timidity/timidity.h 2012-06-01 11:40:44.000000000 +0800
+++ b/timidity/timidity.h 2013-06-06 01:48:14.186722904 +0800
@@ -436,7 +436,7 @@
 /* you cannot but use safe_malloc(). */
 #define HAVE_SAFE_MALLOC 1
 /* malloc's limit */
-#define MAX_SAFE_MALLOC_SIZE (1<<23) /* 8M */
+#define MAX_SAFE_MALLOC_SIZE (1<<26) /* 64M */

 #define DEFAULT_SOUNDFONT_ORDER 0
--- a/timidity++/PKGBUILD 2013-06-06 01:45:15.627480183 +0800
+++ b/timidity++/PKGBUILD 2013-06-06 01:56:25.255489134 +0800
@@ -14,13 +14,16 @@
             'xaw3d: for using the Xaw interface')
 backup=('etc/timidity++/timidity.cfg')
 source=(http://downloads.sourceforge.net/timidity/TiMidity++-${pkgver}.tar.xz \
+        timidity++-maxalloc.diff
         timidity.cfg timidity.service)
 sha1sums=('15ec27f1ea3e718a8d61603521fc16df5c0dd24b'
+          'SKIP'
           '660b3afbb720d26e8f008034cee66dd8da082d6e'
           'f0351b9eb8928d3d82c380107654a7dbe7cd2d54')

 build() {
   cd "${srcdir}/TiMidity++-${pkgver}"
+  patch -p1 <"${srcdir}/timidity++-maxalloc.diff"
   sed -i -e 's/tcl8.5/tcl8.6 tcl8.5/' -e 's/tk8.5/tk8.6 tk8.5/' configure
   sed -i 's/my_interp->result/(char *) Tcl_GetObjResult(my_interp)/' interface/tk_c.c
   ./configure --prefix=/usr --mandir=/usr/share/man --with-default-path=/etc/timidity++/ \
--- a/lib32-fontconfig/PKGBUILD 2013-06-05 06:07:34.000000000 +0800
+++ b/lib32-fontconfig/PKGBUILD 2013-06-05 22:44:01.613122245 +0800
@@ -54,7 +54,10 @@

   make DESTDIR="${pkgdir}" install

-  rm -rf "${pkgdir}"/usr/{include,share,bin} "$pkgdir"/{etc,var}
+  rm -rf "${pkgdir}"/usr/{include,share} "$pkgdir"/{etc,var}
+  for i in "${pkgdir}"/usr/bin/fc-*; do
+    mv "$i" "$i"32
+  done
   mkdir -p "$pkgdir/usr/share/licenses"
   ln -s $_pkgbasename "$pkgdir/usr/share/licenses/$pkgname"
 }
[main]

# Auto save settings when closing window.
auto_save = 0

# The version of this profile's format. DO NOT EDIT IT!
version = 0.9.9

# The default font name of vte terminal.
font_name = Monospace 11

# The default column of vte terminal.
column = 80

# The default row of vte terminal.
row = 24

# Use true opacity in vte box.
# 0: do NOT use rgba, 1: force to use rgba.
# Left it blank will enable it automatically
# if the window manager were composited.
# Disable it will disable transparent_window, too.
use_rgba = 1

# Start up with fullscreen.
fullscreen = 0

# Transparent window. Only enabled when the window manager were composited.
transparent_window = 0

# The opacity of transparent window.
window_opacity = 0.150

# The opacity of transparent window when inactive.
# Left it blank to disable this feature.
window_opacity_inactive = 0.200

# Use transparent background.
# It will use true transparent if the window manager were composited.
transparent_background = 1

# The saturation of transparent background.
background_saturation = 0.201

# Scroll the background image along with the text.
scroll_background = 0

# Sets a background image.
background_image =

# Confirm to execute command with -e/-x/--execute option.
confirm_to_execute_command = 1

# Don't need to confirm for executing a program if it's in the whitelist,
# separate with <space>.
execute_command_whitelist =

# Launching executed command in a new tab instead of opening a new window.
execute_command_in_new_tab = 1

# If a program is running on foreground,
# Don't need to confirm for terminating it if it's in the whitelist,
# separate with <space>.
foreground_program_whitelist = bash dash csh ksh tcsh zsh screen

# If a program is running in background,
# Don't need to confirm for terminating it if it's in the whitelist,
# separate with <space>.
background_program_whitelist = bash dash csh ksh tcsh zsh su

# Confirm before pasting texts to vte terminal.
confirm_to_paste = 1

# If the program is running on foreground,,
# Don't need to confirm for pasting texts to it if it's in the whitelist,
# separate with <space>.
paste_texts_whitelist = editor vi vim elvis nano emacs emacs23 nano joe ne mg ssh

# Confirm to close multi tabs.
confirm_to_close_multi_tabs = 0

# Shows [Transparent Background], [Background Saturation]
# [Transparent Window] and [Window Opacity] on right click menu.
show_background_menu = 1

# Shows [Change the foreground color]
# and [Change the background color] on right click menu.
show_color_selection_menu = 1

# The normal text color used in vte terminal.
# You may use black, #000000 or #000000000000 here.
foreground_color = #000000000000

# Sets the background color for text which is under the cursor.
# You may use black, #000000 or #000000000000 here.
cursor_color = #808080808080

# The background color used in vte terminal.
# You may use black, #000000 or #000000000000 here.
background_color = #ffffffffffff

# Shows [Increase window size], [Decrease window size],
# [Reset to default font/size] and [Reset to system font/size]
# on right click menu.
show_resize_menu = 1

# The ratio when resizing font via function key <Ctrl><+> and <Ctrl><->.
# 0: the font size is +/- 1 when resizing.
font_resize_ratio = 0.000

# The ratio when resizing window via right click menu.
# 0: the font size is +/- 1 when resizing window.
window_resize_ratio = 0.000

# When user double clicks on a text, which character will be selected.
word_chars = -A-Za-z0-9_.+!@&=/~%

# The lines of scrollback history. -1 means unlimited (vte >= 0.22.3).
scrollback_lines = -1

# Shows scroll_bar or not.
# 0: Never shows the scroll_bar; 1: Always shows the scroll_bar.
# Left it blank: Hide when fullscreen, or scrollback_lines = 0.
show_scroll_bar =

# The position of scroll_bar.
# 0: scroll_bar is on left; 1: scroll_bar is on right.
scroll_bar_position = 1

# Shows input method menu on right click menu.
show_input_method_menu = 0

# Shows change page name menu on right click menu.
show_change_page_name_menu = 1

# Shows exit menu on right click menu.
show_exit_menu = 1

# Enable hyperlink in vte terminal.
enable_hyperlink = 1

# Sets whether or not the cursor will blink in vte terminal.
# 0: Follow GTK+ settings for cursor blinking.
# 1: Cursor blinks.
# 2: Cursor does not blink.
cursor_blinks = 0

# Shows copy/paste menu on right click menu.
show_copy_paste_menu = 1

# Embed the copy/paste menu to the main menu.
embedded_copy_paste_menu = 1

# Sets whether or not the terminal will beep
# when the child outputs the "bl" sequence.
audible_bell = 1

# Sets whether or not the terminal will flash
# when the child outputs the "bl" sequence.
visible_bell = 0

# Sets whether or not the window's urgent tag will be set
# when the child outputs the "bl" sequence.
urgent_bell = 1

# Which string the terminal should send to an application
# when the user presses the Delete or Backspace keys.
# 0: VTE_ERASE_AUTO
# 1: VTE_ERASE_ASCII_BACKSPACE
# 2: VTE_ERASE_ASCII_DELETE
# 3: VTE_ERASE_DELETE_SEQUENCE
# 4: VTE_ERASE_TTY
erase_binding = 2

# Sets the shape of the cursor drawn.
# 0: VTE_CURSOR_SHAPE_BLOCK
# 1: VTE_CURSOR_SHAPE_IBEAM
# 2: VTE_CURSOR_SHAPE_UNDERLINE
cursor_shape = 0

# The default locale used when initing a vte terminal.
# You may use "zh_TW", "zh_TW.Big5", or "zh_TW.UTF-8" here.
default_locale =

# The locales list on right click menu, separate with <space>.
# You may use "ja_JP", "ja_JP.EUC-JP", or "ja_JP.UTF-8" here.
# You may want to use "UTF-8" here if you have no locale data installed.
# Left it blank will disable locale and encoding select menu items.
locales_list =

# Sets what type of terminal attempts to emulate.
# It will also set the TERM environment.
# Unless you are interested in this feature, always use "xterm".
emulate_term = xterm

# The environment 'VTE_CJK_WIDTH' used when initing a vte terminal.
# 0: get via environment; 1: use narrow ideograph; 2: use wide ideograph.
VTE_CJK_WIDTH = 1

# The geometry of window when starting.
# A reasonable example value is "80x24+0+0",
# witch means "WIDTH x HEIGHT {+-} XOFFSET {+-} YOFFSET", and NO SPACE in it.
# Notice that it will overwrite the default column and row settings above.
geometry =


[page]

# The max character width of page name.
page_width = 16

# Show the tabs bar or not.
# 0: Never shows the tabs ; 1: Always shows the tabs bar.
# Left it blank: Hide when fullscreen, or tabs number = 1.
show_tabs_bar =

# The position of tabs bar.
# 0: Top, 1: bottom.
tabs_bar_position = 0

# The label of tabs will fill the tab bar.
fill_tabs_bar = 0

# The page name used for a new page.
page_name = Terminal

# The page names list used for new pages, separate with <space>.
page_names = Terminal

# Reuse the page name in the page names list.
reuse_page_names = 1

# Shows a (number no) on the page name.
page_shows_number = 1

# Shows the foreground running command on the page name.
page_shows_current_cmdline = 1

# Shows the terminal's idea of what the window's title should be.
page_shows_window_title = 1

# Shows current directory on the page name.
page_shows_current_dir = 1

# Check if the running command is root privileges.
check_root_privileges = 1

# Shows current encoding on the page name.
page_shows_encoding = 1

# Bold the text of current page name.
bold_current_page_name = 1

# Bold the text of action page name.
bold_action_page_name = 1

# Shows the page name of current page on window title.
window_title_shows_current_page = 1

# Append a package name (- LilyTerm) to the window title.
window_title_append_package_name = 1

# Shows a close button [X] on current tab.
show_close_button_on_tab = 1

# Shows a close button [X] on all tabs.
show_close_button_on_all_tabs = 0

# Use colorful text on page.
use_color_page = 1

# The color used for showing Window Title on page name.
# You may use black, #000000 or #000000000000 here.
page_win_title_color = #9A6401

# The color used for showing Running Command on page name.
# You may use black, #000000 or #000000000000 here.
page_cmdline_color = #1C1CDC

# The color used for showing Current Dir on page name.
# You may use black, #000000 or #000000000000 here.
page_dir_color = #215E3E

# The color used for showing Custom Tab Name on page name.
# You may use black, #000000 or #000000000000 here.
page_custom_color = #9C0A81

# The color used for showing Root Privileges on page name.
# You may use black, #000000 or #000000000000 here.
page_root_color = #BE0020

# The color used for showing Normal Text on page name.
# You may use black, #000000 or #000000000000 here.
page_normal_color = #333333


[key]

# Disable/Enable hyperlinks, function keys and right click menu.
# Left it blank to disable this function key.
disable_key_binding =

# Add a new tab.
# Left it blank to disable this function key.
new_tab_key = Shift+Ctrl T

# Close current tab.
# Left it blank to disable this function key.
close_tab_key = Shift+Ctrl W

# Rename the page name of current tab.
# Left it blank to disable this function key.
edit_label_key =

# Find the strings matching the search regex.
# Left it blank to disable this function key.
find_key = Shift+Ctrl F

# Find the previous string matching the search regex.
# Left it blank to disable this function key.
find_key_prev = Shift+Ctrl G

# Find the next string matching the search regex.
# Left it blank to disable this function key.
find_key_next = Shift+Ctrl H

# Switch to prev tab.
# Left it blank to disable this function key.
prev_tab_key = Ctrl Page_Up

# Switch to next tab.
# Left it blank to disable this function key.
next_tab_key = Ctrl Page_Down

# Switch to first tab.
# Left it blank to disable this function key.
first_tab_key =

# Switch to last tab.
# Left it blank to disable this function key.
last_tab_key =

# Move current page forward.
# Left it blank to disable this function key.
move_tab_forward = Shift+Ctrl Page_Up

# Move current page backward.
# Left it blank to disable this function key.
move_tab_backward = Shift+Ctrl Page_Down

# Move current page to first.
# Left it blank to disable this function key.
move_tab_first =

# Move current page to last.
# Left it blank to disable this function key.
move_tab_last =

# Switch to #1 tab directly.
# Left it blank to disable this function key.
switch_to_tab_1 = Alt 1

# Switch to #2 tab directly.
# Left it blank to disable this function key.
switch_to_tab_2 = Alt 2

# Switch to #3 tab directly.
# Left it blank to disable this function key.
switch_to_tab_3 = Alt 3

# Switch to #4 tab directly.
# Left it blank to disable this function key.
switch_to_tab_4 = Alt 4

# Switch to #5 tab directly.
# Left it blank to disable this function key.
switch_to_tab_5 = Alt 5

# Switch to #6 tab directly.
# Left it blank to disable this function key.
switch_to_tab_6 = Alt 6

# Switch to #7 tab directly.
# Left it blank to disable this function key.
switch_to_tab_7 = Alt 7

# Switch to #8 tab directly.
# Left it blank to disable this function key.
switch_to_tab_8 = Alt 8

# Switch to #9 tab directly.
# Left it blank to disable this function key.
switch_to_tab_9 = Alt 9

# Switch to #10 tab directly.
# Left it blank to disable this function key.
switch_to_tab_10 = Alt 0

# Switch to #11 tab directly.
# Left it blank to disable this function key.
switch_to_tab_11 =

# Switch to #12 tab directly.
# Left it blank to disable this function key.
switch_to_tab_12 =

# Open a new window with current dir.
# Left it blank to disable this function key.
new_window = Shift+Ctrl N

# Select all the text in the Vte Terminal box.
# Left it blank to disable this function key.
select_all =

# Copy the text to clipboard.
# Left it blank to disable this function key.
copy_clipboard = Shift+Ctrl C

# Paste the text in clipboard.
# Left it blank to disable this function key.
paste_clipboard = Shift+Ctrl V

# Paste the text in the primary clipboard.
# Left it blank to disable this function key.
paste_clipboard in primary = Shift Insert

# Increase the font size of current tab.
# Left it blank to disable this function key.
increase_font_size = Shift+Ctrl plus

# Decrease the font size of current tab.
# Left it blank to disable this function key.
decrease_font_size = Ctrl minus

# Reset the font of current tab to original size.
# Left it blank to disable this function key.
reset_font_size = Ctrl 0

# Try to maximum the window to use all available space on your display.
# Left it blank to disable this function key.
max_window = F11

# Asks to place window in the fullscreen/unfullscreen state.
# Left it blank to disable this function key.
full_screen = Alt Return

# Emulate a mouse scroll up event on Vte Terminal box.
# Left it blank to disable this function key.
scroll_up = Shift Page_Up

# Emulate a mouse scroll down event on Vte Terminal box.
# Left it blank to disable this function key.
scroll_down = Shift Page_Down

# Asks to scroll up 1 line on Vte Terminal box.
# Left it blank to disable this function key.
scroll_up_1_line = Shift Up

# Asks to scroll down 1 line on Vte Terminal box.
# Left it blank to disable this function key.
scroll_down_1_line = Shift Down


[color]

# The main ansi color theme used in vte.
# Possible values are linux, xterm, rxvt, and tango.
# or left it blank to use the default settings form libvte.
theme = tango

# Invert the ansi colors, like invert the darkred to red, darkblue to bule.
invert_color = 0

# The brightness for ansi colors used in terminal.
brightness = 0.200

# The brightness for ansi colors used in terminal when inactive.
# Left it blank to disable this feature.
inactive_brightness = 0.200

# The ANSI color code for Normal Black
# You may use black, #000000 or #000000000000 here.
Color0 =

# The ANSI color code for Normal Red
# You may use black, #000000 or #000000000000 here.
Color1 =

# The ANSI color code for Normal Green
# You may use black, #000000 or #000000000000 here.
Color2 =

# The ANSI color code for Normal Yellow
# You may use black, #000000 or #000000000000 here.
Color3 =

# The ANSI color code for Normal Blue
# You may use black, #000000 or #000000000000 here.
Color4 =

# The ANSI color code for Normal Magenta
# You may use black, #000000 or #000000000000 here.
Color5 =

# The ANSI color code for Normal Cyan
# You may use black, #000000 or #000000000000 here.
Color6 =

# The ANSI color code for Normal White
# You may use black, #000000 or #000000000000 here.
Color7 =

# The ANSI color code for Bright Black
# You may use black, #000000 or #000000000000 here.
Color8 =

# The ANSI color code for Bright Red
# You may use black, #000000 or #000000000000 here.
Color9 =

# The ANSI color code for Bright Green
# You may use black, #000000 or #000000000000 here.
Color10 =

# The ANSI color code for Bright Yellow
# You may use black, #000000 or #000000000000 here.
Color11 =

# The ANSI color code for Bright Blue
# You may use black, #000000 or #000000000000 here.
Color12 =

# The ANSI color code for Bright Magenta
# You may use black, #000000 or #000000000000 here.
Color13 =

# The ANSI color code for Bright Cyan
# You may use black, #000000 or #000000000000 here.
Color14 =

# The ANSI color code for Bright White
# You may use black, #000000 or #000000000000 here.
Color15 =


[command]

# The parameters of the APPLICATION should be separated with <tab>, if any.
#
# method = {0,1,2}
# 0: Open the hyperlink in new tab.
#    Use it if the command were using CLI, like w3m.
# 1: Open the hyperlink with gdk_spawn_on_screen_with_pipes().
#    Use it if the command were using GUI, like firefox.
# 2: Open the hyperlink in new window,
#    Use it if you not sure.
#
# VTE_CJK_WIDTH = {0,1,2}
# 0: get via environment
# 1: use narrow ideograph
# 2: use wide ideograph.
#
# The ENVIRONS will apply to the application, separated with <tab>, too.
#
# The LOCALE will apply to the application as locale environs.
# You may use "zh_TW", "zh_TW.Big5", or "zh_TW.UTF-8" here.
# Left it blank to use the locale environs from current page.

# The web browser using for http(s)://
web_browser = xdg-open
web_method = 1
web_VTE_CJK_WIDTH = 0
web_environ =
web_locale =

# The ftp client using for ftp(s)://
ftp_client = xdg-open
ftp_method = 1
ftp_VTE_CJK_WIDTH = 0
ftp_environ =
ftp_locale =

# The file manager using for file:// and [Open current directory with file manager]
file_manager = xdg-open
file_method = 1
file_VTE_CJK_WIDTH = 0
file_environ =
file_locale =

# The email client using for user@host
email_client = xdg-open
email_method = 1
email_VTE_CJK_WIDTH = 0
email_environ =
email_locale =
# 不要乱转义中文--restrict-file-names=nocontrol# 使用重定向后的文件名--trust-server-names=on--content-disposition=on
openssh GuizmOVPN
openssh com.guizmo.openvpn
openssh openvpn usbmuxd 你可能还想要 libimobiledevice ifuse
local 127.0.0.1port 1194proto tcpdev tunca ca.crtcert server.crtkey server.keydh dh1024.pemserver 10.8.0.0 255.255.255.0push "dhcp-option DNS 8.8.8.8"push "dhcp-option DNS 8.8.4.4"client-to-clientduplicate-cnkeepalive 10 120verb 3
clientdev tunproto tcpremote localhost 1194nobindpersist-keypersist-tunca ca.crtcert client.crtkey client.keyns-cert-type serververb 3up ./guizmovpn_updown.shdown ./guizmovpn_updown.sh
#!/bin/bash

#######################
# GuizmOVPN_updown.sh #
# Version 1.0.6       #
#######################

function CopyKey
{
 if [ "`KeyExists $1`" == "NO" ] ; then
  return
 fi
        source=$1;
        dest=$2;
 error="0";
        echo "d.init" >/tmp/tmpscutil
        for param in `echo "show $1" | /usr/sbin/scutil | grep -v "<dictionary>" | tr -d '\n' | tr '}' '\n' | awk '{ print $1 }'` ; do
                value=`echo "show $1" | /usr/sbin/scutil| grep -v "<dictionary>" | tr -d '\n' | tr '}' '\n' | grep $param`
  if $( echo $value | grep --quiet '<array>' ) ; then
                        unset array_val
                        for arraynum in 2 3 4 5 6 7 8 9 ; do
                                val=`echo $value | cut -d '{' -f 2 | cut -d ':' -f $arraynum | cut -d ' ' -f 2`
                                if [ "$val" != "" ] ; then
                                        array_val[$(($arraynum-1))]=$val;
                                fi
                        done
                        if [ ${#array_val[@]} ]; then
                                echo "d.add $param * ${array_val[*]}" >>/tmp/tmpscutil
                        else
    error="1"
   fi
                else
                        val=`echo "$value" | awk '{ print $3 }'`
                        if [ "`echo "$val" | tr -d ' '`"  == "" ] ; then
                                error="1";
                        else
                                echo "d.add $param $val" >>/tmp/tmpscutil
                        fi
                fi

        done
        echo "set $dest" >>/tmp/tmpscutil
 if [ "$error"=="0" ] ; then
  cat /tmp/tmpscutil | /usr/sbin/scutil
 else
  echo "Error reading key $1"
 fi
}

function GetActualDNS
{
 OLDDNS=`echo "show State:/Network/Service/$1/DNS" | /usr/sbin/scutil | grep -A 1 "ServerAddresses : " | grep "0 : " | awk '{print $3}' | tr -d " "`
 echo $OLDDNS
}

function KeyExists
{
 if [ "`echo "show $1" | /usr/sbin/scutil | tr -d " "`" == "Nosuchkey" ] ; then
  echo "NO" ;
 else
  echo "YES" ;
 fi
}

PSID=$( (/usr/sbin/scutil | grep PrimaryService | sed -e 's/.*PrimaryService : //')<< EOF
open
get State:/Network/Global/IPv4
d.show
quit
EOF
)

case "$script_type" in
   up)
     # Stop the APSd
     #/bin/launchctl unload /System/Library/LaunchDaemons/com.apple.apsd.plist

     # Remove informations about a previous connection
     echo "remove State:/Network/Service/OpenVPN/DNS" | /usr/sbin/scutil >/dev/null 2>&1
     echo "remove State:/Network/Service/OpenVPN/IPv4" | /usr/sbin/scutil >/dev/null 2>&1
     echo "remove State:/Network/Service/OpenVPN/PPP" | /usr/sbin/scutil >/dev/null 2>&1
     echo "remove State:/Network/Service/OpenVPN/PSID" | /usr/sbin/scutil >/dev/null 2>&1

     # Check if we need to handle DNSPush
     unset dns
     unset domain
     if [ "$DNSPush" == "Y" ] ; then
 # Store the PSID that we modify, in order to restore the correct one on disconnection
        if [ "$PSID" != "" ] ; then
                echo "d.init" >/tmp/tmpscutil
                echo "d.add PSID $PSID" >>/tmp/tmpscutil
                echo "set State:/Network/Service/OpenVPN/PSID" >>/tmp/tmpscutil
                cat /tmp/tmpscutil | /usr/sbin/scutil
        fi

 # Save the DNS settings
 # If it has already been set, don't save it again
 if [ "`KeyExists State:/Network/Global/DNSold`" == "NO" ] ; then
  CopyKey Setup:/Network/Service/$PSID/DNS Setup:/Network/Service/$PSID/DNSold ;
  CopyKey State:/Network/Service/$PSID/DNS State:/Network/Service/$PSID/DNSold ;
  CopyKey State:/Network/Global/DNS State:/Network/Global/DNSold ;
 fi

      n=1; i=0; j=0;
      while o=foreign_option_${n}; o=${!o}; [ "$o" ]
      do
           case $o in
            'dhcp-option DNS '*)        dns[i++]=${o/dhcp-option DNS /};;
              'dhcp-option DOMAIN '*)     domain[j++]=${o/dhcp-option DOMAIN /} ;;
           esac;
           let n++
      done

 # Check if we need to try to keep local DNS
      if [ "$DNSKeep" == "Y" ] ; then
  # If DNS push has been set, add the actual DNS in the list, in case the DNS pushed don't respond
  if [ $i != 0 ] && [ $i -le 3 ] ; then
          dns[i]=`GetActualDNS $PSID`;

    # Check if the DNS is different from the gateway IP.
    # If it's the case, add a route to it
    if [ "$traffic_is_redirected" == "1" ] && [ "$dns[i]" != "" ] && [ "$route_net_gateway" != "${dns[i]}" ] && [ "$route_net_gateway" != "" ] ; then
    echo "Add a route to ${dns[i]} with gateway $route_net_gateway" ;
    /sbin/route add -net ${dns[i]} $route_net_gateway 255.255.255.255;
    fi
       fi
 fi

      if [ "${dns[0]}" != "" ] ; then
  echo "Setting DNS to /Network/Service/$PSID/DNS (${dns[*]})"
  echo "d.init" >/tmp/tmpscutil
         echo "d.add ServerAddresses * ${dns[*]}" >>/tmp/tmpscutil
  if [ "${domain[0]}" != "" ] ; then
   echo "Setting domain to /Network/Service/$PSID/DNS (${domain[*]})"
   echo "d.add SupplementalMatchDomains * ${domain[*]}" >>/tmp/tmpscutil
  fi
  echo "set State:/Network/Service/$PSID/DNS" >>/tmp/tmpscutil

  cat /tmp/tmpscutil | /usr/sbin/scutil

  # For a strange reason, some devices don't use the "State" but the "Setup", so we copy the key.
  if [ "`KeyExists Setup:/Network/Service/$PSID/DNS`" == "YES" ] ; then
                 CopyKey State:/Network/Service/$PSID/DNS Setup:/Network/Service/$PSID/DNS
                fi
  CopyKey State:/Network/Service/$PSID/DNS State:/Network/Service/OpenVPN/DNS
                CopyKey State:/Network/Service/$PSID/DNS State:/Network/Global/DNS
 fi
     fi

     # Add informations about the connection
     # IPv4
     echo "d.init" >/tmp/tmpscutil
     echo "d.add DestAddresses * $trusted_ip" >>/tmp/tmpscutil
     echo "d.add ServerAddress $trusted_ip" >>/tmp/tmpscutil
     echo "d.add InterfaceName ppp0" >>/tmp/tmpscutil
     echo "d.add Addresses * $ifconfig_local" >>/tmp/tmpscutil
     echo "d.add SubnetMasks * 255.255.255.255" >>/tmp/tmpscutil
     echo "d.add NetworkSignature VPN.RemoteAddress=$trusted_ip" >>/tmp/tmpscutil
     echo "set Setup:/Network/Service/OpenVPN/IPv4" >>/tmp/tmpscutil
     echo "set State:/Network/Service/OpenVPN/IPv4" >>/tmp/tmpscutil

     # PPP
     echo "d.init" >>/tmp/tmpscutil
     echo "d.add Status 8" >>/tmp/tmpscutil
     echo "d.add InterfaceName ppp0" >>/tmp/tmpscutil
     echo "set Setup:/Network/Service/OpenVPN/PPP" >>/tmp/tmpscutil
     echo "set State:/Network/Service/OpenVPN/PPP" >>/tmp/tmpscutil

     # Interface
     echo "d.init" >>/tmp/tmpscutil
     echo "d.add Type PPP" >>/tmp/tmpscutil
     echo "d.add SubType OpenVPN" >>/tmp/tmpscutil
     echo "set Setup:/Network/Service/OpenVPN/Interface" >>/tmp/tmpscutil

     cat /tmp/tmpscutil | /usr/sbin/scutil

     # Add infos about connection to be displayed in GUI
     /Applications/GuizmOVPN.app/tools writeprefs InfosIPAddress "$ifconfig_local"
     if [ "$ifconfig_netmask" == "" ] ; then
          /Applications/GuizmOVPN.app/tools writeprefs InfosSubnetMask "255.255.255.255"
   /Applications/GuizmOVPN.app/tools writeprefs InfosGateway "$ifconfig_remote"
     else
          /Applications/GuizmOVPN.app/tools writeprefs InfosSubnetMask "$ifconfig_netmask"
   /Applications/GuizmOVPN.app/tools writeprefs InfosGateway "$InfosGateway"
     fi
     /Applications/GuizmOVPN.app/tools writeprefs InfosTrafficRedirected "$traffic_is_redirected"

     # Start the APSd
     #/bin/launchctl load /System/Library/LaunchDaemons/com.apple.apsd.plist
   ;;

   down)
     # Remove the connection infos
     /Applications/GuizmOVPN.app/tools writeprefs InfosIPAddress ""
     /Applications/GuizmOVPN.app/tools writeprefs InfosSubnetMask ""
     /Applications/GuizmOVPN.app/tools writeprefs InfosGateway ""
     /Applications/GuizmOVPN.app/tools writeprefs InfosTrafficRedirected ""

      # Check if we have a stored PSID. If not, take the actual one
      OLD_PSID=`echo "show State:/Network/Service/OpenVPN/PSID" | /usr/sbin/scutil | grep PSID | awk '{print $3}'`
      if [ "$OLD_PSID" == "" ] ; then
          OLD_PSID=$PSID
      fi

      # If we have saved DNS, restore them
      if [ "$OLD_PSID" != "" ] && [ "`KeyExists State:/Network/Global/DNSold`" == "YES" ] ; then
          echo "Restoring DNS to $OLD_PSID";
          CopyKey Setup:/Network/Service/$OLD_PSID/DNSold Setup:/Network/Service/$OLD_PSID/DNS ;
          CopyKey State:/Network/Service/$OLD_PSID/DNSold State:/Network/Service/$OLD_PSID/DNS ;
          CopyKey State:/Network/Global/DNSold State:/Network/Global/DNS ;

   echo "remove Setup:/Network/Service/$OLD_PSID/DNSold" | /usr/sbin/scutil >/dev/null 2>&1 ;
   echo "remove State:/Network/Service/$OLD_PSID/DNSold" | /usr/sbin/scutil >/dev/null 2>&1 ;
   echo "remove State:/Network/Global/DNSold" | /usr/sbin/scutil >/dev/null 2>&1 ;
      fi

      # Check if we need to remove the route we added for the DNS
      if [ "$traffic_is_redirected" == "1" ] && [ "$route_net_gateway" != "`GetActualDNS $OLD_PSID`" ] && [ "$route_net_gateway" != "" ] && [ "`GetActualDNS $OLD_PSID`" != "" ] ; then
    echo "Removing route to `GetActualDNS $OLD_PSID` with gateway $route_net_gateway"
   /sbin/route delete -net `GetActualDNS $OLD_PSID` $route_net_gateway 255.255.255.255
      fi

      # Remove informations about the connection
      echo "remove State:/Network/Service/OpenVPN/DNS" | /usr/sbin/scutil >/dev/null 2>&1
      echo "remove State:/Network/Service/OpenVPN/IPv4" | /usr/sbin/scutil >/dev/null 2>&1
      echo "remove State:/Network/Service/OpenVPN/PPP" | /usr/sbin/scutil >/dev/null 2>&1
      echo "remove State:/Network/Service/OpenVPN/PSID" | /usr/sbin/scutil >/dev/null 2>&1

      echo "remove Setup:/Network/Service/OpenVPN/IPv4" | /usr/sbin/scutil >/dev/null 2>&1
      echo "remove Setup:/Network/Service/OpenVPN/PPP" | /usr/sbin/scutil >/dev/null 2>&1
      echo "remove Setup:/Network/Service/OpenVPN/Interface" | /usr/sbin/scutil >/dev/null 2>&1
   ;;
   *) echo "$0: invalid script_type $script_type" && exit 1 ;;
esac

#####
#!/bin/shsudo -vsudo usbmuxdiproxy 2222 22 &sudo -n openvpn --config server.ovpn &sleep 1exec ssh root@localhost -p 2222 -R 1194:localhost:1194 /var/root/iptether/ovpncon.sh
#!/bin/sh(cd /var/root/iptether; /Applications/GuizmOVPN.app/openvpn --config client.ovpn --script-security 2) &
#!/bin/sh/usr/sbin/scutil << EOFopend.initd.add ServerAddresses * 8.8.8.8 8.8.4.4set State:/Network/Service/OpenVPN/DNSquitEOF
echo 1 | sudo tee /proc/sys/net/ipv4/ip_forward
net.ipv4.ip_forward = 1
sudo iptables -t nat -A POSTROUTING -j MASQUERADE
*nat-A POSTROUTING -j MASQUERADECOMMIT